Showing posts with label DIY. Show all posts

Halloween 'Zines: Razors In The Night


It's time for another Halloween 'zine review! Growing up as a punk rock kid, I collected many a fanzine through the years. Small, DIY handmade photocopied, low-budget mini magazines that covered all aspects of the music genre, created and produced by the very participants within that scene. There's just something about holding a small magazine that was created and assembled by hand that always felt so tactile and genuine to me. And when I later became a home haunter, I discovered the same medium and immediately began collecting them.


Next up in my collection is Razors In The Night. This one isn't a straight Halloween 'zine, but with a subtitle of "For The Discerning Gore Hounds," this first issue is still on point!

If, like me, you were a discerning gore hound in the 80s, then this 'zine is right up your alley! It harkens back to the glory days of Fangoria Magazine, but goes way deeper and way darker in its hand drawn, cut-and-paste, black-and-white photocopied rawness.

It has reviews of deep underground, low-budget horror films (the best kind!), but keeps a foot in the Halloween realm with great stories on haunted houses and ends with the sad story of the tragic Six Flags Great Adventure Haunted Castle fire in 1984. Definitely worth the read.

Give Razors In The Night a follow on their Instagram page, and then go shopping on their Big Cartel page. Issue #1 is now unfortunately sold out, but issue #2 will be coming out on Halloween! And if it's limited like the first issue, it will sell out quick, too. So get on it, gore hounds!


Halloween 'Zines: Ghostlore


It's time for another Halloween 'zine review! Growing up as a punk rock kid, I collected many a fanzine through the years. Small, DIY handmade photocopied, low-budget mini magazines that covered all aspects of the music genre, created and produced by the very participants within that scene. There's just something about holding a small magazine that was created and assembled by hand that always felt so tactile and genuine to me. And when I later became a home haunter, I discovered the same medium and immediately began collecting them.


Up next is Ghostlore Zine created by Wychwood Arts. I originally followed the Wychwood Arts Instagram page for all of the cool Halloween art, but when I saw that they also made 'zines, I was in!

I ended up grabbing three issues of Ghostlore from the Wychwood Arts Big Cartel page. Unfortunately, the first issue is sold out, so I'm left hoping for a reprint to complete my set.

The zines themself are a ton of fun. Each perfect-bound (no staples) issue is packed full of great original art and stories, awesome "Terror On Tape" dark music reviews (my favorite!), cool interviews, and pages of fun word searches and puzzles. And perhaps the best part of all is the extra inserts and personalized, hand-drawn thank you note that were included. You can really tell that lots of care went into each issue. Each is a great black-and-white presentation on Halloween creepiness and fun and I HIGHLY recommend every one!

Issues 2, 3, and 4 are still available over at the Wychwood Arts Big Cartel page (along with great, original art and other merch), and it was recently announced that issue 5 will be dropping this week, so get on it!!

Ghostlore is definitely a great addition to my Halloween zine October reading list.


Halloween 'Zines: Disembodied


It's time for another Halloween 'zine review! Growing up as a punk rock kid, I collected many a fanzine through the years. Small, DIY handmade photocopied, low-budget mini magazines that covered all aspects of the music genre, created and produced by the very participants within that scene. There's just something about holding a small magazine that was created and assembled by hand that always felt so tactile and genuine to me. And when I later became a home haunter, I discovered the same medium and immediately began collecting them.


Up this time is Disembodied Zine created by none other than Slasher Dave! Not only is he a wizard at creating incredible Halloween-themed music, but he holds his own as a fine and graphic artist, as well.

I ended up grabbing the debut issue of Disembodied late last year from Dave's Big Cartel page. I went with the "Box Set" version, as I'm always a sucker for added goodies! In the box, I received the autographed zine itself along with a cool bookmark, pencil, pencil sharpener, pin AND super cool slider puzzle.

And the zine itself is a ton of fun. With a nice, thick two-color cover and black-and-white pages, it takes the incredible essence of Halloween in the 80s and pieces it all out into a handful of great stories (Halloween companies, Halloween haunted houses, Halloween toys, Halloween ads, Halloween costumes, and Halloween TV specials). Add in some fun Halloween-themed word puzzles and games, a page to draw your own haunted house floor plan, and a blank page to draw your own Halloween art, and you have one incredibly awesome Halloween zine.

The debut issue of Disembodied is still available here and is HIGHLY recommended for anyone wanting a shot of that great 80s Halloween magic. Dave really nailed that authentic, old school nostalgia.

The only problem now is having to wait for the next issue to drop! Fingers crossed that we see a new issue yet this October!!


Halloween 'Zines: Haunt


I'm adding a new feature to my October blogging this year: Halloween 'zine reviews!! Growing up as a punk rock kid, I collected many a fanzine through the years. Small, DIY handmade photocopied, low-budget mini magazines that covered all aspects of the music genre, created and produced by the very participants within that scene. There's just something about holding a small magazine that was created and assembled by hand that always felt so tactile and genuine to me. And when I later became a home haunter, I discovered the same medium and immediately began collecting them.


First up is GroovyDoom's
Haunt 'zine series. I ended up picking up the entire 10-issue series from the Etsy store and I'm so glad I did. Haunt absolutely nails the Halloween nostalgia in each issue, with pages crammed full of black-and-white Halloween ads, photos and article clippings from the 70's and 80's (my wheelhouse!).

As I flipped through each issue, I was transported back to those magical October days of my youth when I would race home from school and grab the Friday magazine insert from the newspaper, quickly scanning newsprint page after newsprint page of local haunted house ads (which in Northeast Ohio there were tons!) until my fingers were black from the ink. And then at dinner, I would BEG my parents to take me and my friends to each of them.

And while each issue of Haunt is a quick read, there is still enough old Halloween fun to keep me greedily grabbing for the next issue.

The entire Haunt 'zine series is a must-have, with super-cool illustrated covers and loads of old Halloween and haunted house ads. Each issue is a total blast to flip through and is a welcome slice of Halloweens past. And the photocopied black-and-white pages take me back to being a punk rock kid again.

Issue 11 is dropping now and all issues are available at the GroovyDoom Etsy store. Get it now!


Charnel House - "L'Appel Du Vide"


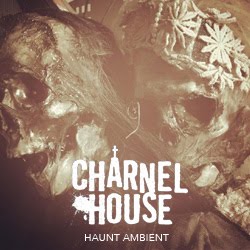
With mere hours to spare before heading out to the Midwest Haunters Convention, my new Charnel House CD, "L'Appel Du Vide" is finished! 3 tracks of "haunt ambient" audio, perfect for a home haunt or haunted house scene setting.

This release is my first foray into the world of music composition and represents my first steps into learning to create this specific style of audio. I had discovered the dark ambient genre about 8 years ago, fell in love with it, began using it in my annual yard haunt display and finally decided late last year that I wanted to try my hand at creating my own haunt-specific version it.

This version of "L'Appel Du Vide" is a limited, hand-numbered "2018 Midwest Haunters Convention" edition of 20 and comes with a hand-numbered CD and silkscreened Charnel House patch, housed in a hand-numbered gatefold sleeve. Every facet of this release, from the creation of the logo, photography and sleeve art, to the silkscreened patch and the hand-stamped and numbered Memorex CD-R was produced in-house here at the Cemetery. Super DIY all the way!

And for anyone lucky enough to be at the Midwest Haunters Convention this weekend in Columbus, Ohio, find me on the tradeshow floor and I'll give you a copy of the CD!

I hope to see you there!


DIY Screenprinting - Part 2


We're back with the second half of our DIY screenprinting how-to. Yesterday, we built a light exposure unit on the cheap, and we are now ready to get our final art transferred to the screen and ready to print.


Part 2 : Exposing The Screen

Before starting this step, there are a few items that you will need to have. I picked up everything on this list from Pat Catan's, but you can also get them at Michael's or even on Amazon.com.

Here is the list of items that will be needed (the links go to amazon.com for photo reference):

- 10" x 14" Speedball Screen Printing Frame
- 10" Squeegee (for spreading both the emulsion and then the ink)
- Speedball Diazo Photo Emulsion Kit (contains a bottle of photo emulsion, a smaller bottle of developer and a bottle of emulsion remover)
- A clean piece of glass or plexiglass that is larger than the screen (I used a piece of replacement glass for a picture frame)
- A piece of inkjet-compatible transparency

To begin part 2, we must have artwork ready to use. For this how-to, I used the artwork for our new 2013 yard haunt shirt, based on our new logo. I created this artwork in Adobe Illustrator. I recommend using it or another vector art-based program when setting up your work versus a pixel-based program like Photoshop. The vector art will give you clear and crisp shapes and will produce a better image when printed.


The final artwork was converted to a black and white image (no greytones), where the black will print through and the white will block out. Once the art was finalized, I printed it out on a piece of inkjet-ready transparency. I made sure that I used a "best quality" setting on the printer to insure that I got a rich black on the printout. If you don't have a piece of transparency, you can take your art to a local FedEx Kinko's and have them print one for you.


Once the transparency was printed out, it was time to mix the photo emulsion and apply it to the screen. The Diazo Photo Emulsion was easy to mix (add water to the developer bottle and then mix that into the emulsion - the final mix will turn green) and was very easy to apply, as you did not have to apply it in the dark. I used the squeegee to apply a thin, even coating to both sides of the screen.


(Note that the dark image on the screen in the photo above was a ghost image from the previous project that was applied to this particular screen. The black ink from that previous screen actually stains the screen, but the screen was completely cleaned before the new emulsion was applied.)

Once the even emulsion coating is applied, I let the screen dry completely in the dark. I could be wrong, but I think that once the emulsion dries, it becomes light sensitive, so keep it in very low light until it's time to use the exposure unit...

When the screen is completely dry, it is ready for the image to be burned into it. This is where you take the transparency printout and tape it to the bottom (flat) side of the screen. VERY IMPORTANT: be sure to attach the transparency "backwards." This way, the image will read the right way when you go to apply the ink from the opposite side.

With the transparency taped tightly to the bottom of the screen, place it onto the light exposure unit. Place the oversized glass on top of the transparency. This will form a tight seal on the screen and insure that you get nice, crisp contrast when the screen gets exposed to the light.

Once everything is in place, turn on the halogen lamp on the top of the exposure unit.


I have found that an exposure time of 15 minutes works well with a 500 watt lamp. Simply turn on the light and leave it be. After the 15 minutes is up, turn off the exposure unit lamp. I have a utility tub in my basement that I use to wash the screen after exposing it. I run lukewarm water over the screen at a brisk flow. After a few minutes, the areas that were black on the transparency will wash out, leaving your new image in your screen. Be sure to wash all of the detail areas out, because the ink will only pass through the open areas of your screen.


Gently dab the excess water from the screen with a paper towel, and then let the screen dry completely overnight. In the morning, your new silkscreen will be ready for printing.


DIY Screenprinting - Part 1


Every year, I screen print one-color t-shirts for our home haunt and give them out as a thank you to everyone who comes over and helps put up, tear down or just gets dressed up and scares on Halloween night. I have always created the artwork and then passed it off to a friend (who has his own screen printing studio) to create a screen for me.

Last year I finally decided to bring the whole process in-house and was surprised at how easy and inexpensive it was to do. By following this quick two-step process, you can create simple shirts, posters, patches and more for your home haunt or Halloween project.

Here is part one of setting up your own in-house screen printing studio...


Part 1: Building Your Light Exposure Unit

In screen printing, you are dealing with positive and negative space in your art. In simple terms, the positive (black) area of your art will be the areas that will have ink and the negative (white) areas will block out. 

To get a print-ready screen, you must first have a silk screen covered with a light-sensitive emulsion coating and a positive/negative transparency (which I will cover in Step 2). This screen must be exposed to an intense light source so that the screen will be activated and ready for printing.

The first step in this process is building your light exposure unit. Here is the simple materials list needed to build the unit pictured below.


Note that the unit isn't perfectly square or made with the highest quality materials. Our goal is to simply make a unit that will support the light at the top. I gathered scrap 2x4s from the garage to make the framework and picked up the light from Lowe's.

Here's the breakdown of materials used:

- 2x feet @24" each (The feet will need to be long enough so that your silkscreen can lay flat across them when it is being exposed. Be sure to attach these board flat - this way the screen will have a solid base to rest on)

- 1x base @20" (the feet will screw into either end of the base)

- 1x support post @18" (this is the vertical piece that supports the arm)

- 1x arm @ 10" (this piece will support the light)

- 3" screws to put it all together

- 1x 500 watt utility work light. I used this one at Lowes.

Once you have all of the pieces of wood screwed together to look like the framework above, tighten the clamp on the light and firmly attach it to the end of the arm. You want to make sure the light is tight because you don't want it moving around when exposing your screen. You'll also want to make sure the light is positioned directly above the center of the feet. When exposing the screen, you'll want the light to shine directly down onto your screen so that there are no shadows from angled lighting.

And just like that, you have finished the hardest part of the screen printing process! Tomorrow I'll show you how to create final artwork and expose your screen in preparation for printing.