Showing posts with label LED light. Show all posts

Lenore Sofia Highbury Tombstone


It's always nice to get that first tombstone of the season under your belt. The first project that opens the floodgates for the rest of the Halloween season projects. I know it's the end of August already, but it's finally go time at Highbury Cemetery! I proudly present my newest tombstone prop and newest member to reside within the rusted gates of Highbury Cemetery, Ms. Lenore Sofia Highbury...


It took a while to get things going for this year, but I'm REALLY happy with the way this one turned out! I decided that I needed a few more females within my cemetery, so Lenore Sofia earned her stone. A strange idea came out of nowhere when I started working on the epitaph, and I decided that this stone's epitaph would all be in French. I thought it would add a little bit of worldly class and sophistication to my display (or maybe it popped into my head when France won this year's World Cup, I can't be sure...). Either way, I thought it was a cool idea and ran with it.


Let me show you how I created it...

As always, I start with the epitaph. I created the full epitaph, complete with names, birth and death dates - all of which in the Highbury household mysteriously die on October 31st - and a few little flourishes and clip art crosses to give it a bit extra.

Translated, the epitaph reads...

In Memory

Lenore Sofia Highbury

Born - January 19, 1809
Died - October 31, 1848

Death by Delirium Tremens (Severe, Fatal Alcohol Withdrawal Delirium)

Rest In Peace


I then come up with an interesting shape, this time based on a piece of scrap 2" thick blue foam that I had laying around in the garage.

I create the final art at 100% size in Adobe Illustrator, then print out the entire thing, tiling the 8.5" x 11" sheets together.


I also had a small paper mache skull that I wanted to use for this stone, similar to the Boris Karloff, Bela Lugosi and Von Bloemhof tombstones that I made it previous years. I also had some LED prop eyes inserted into the stone to illuminate the skull's eyes, although I forgot to photograph it this time around. Just go look at my previous stone links to see how it was done.

Once the epitaph was printed out and tiled, I used repositionable glue sticks to adhere the printout to the tombstone shape that I had cut out. I then used a couple of different bits in my handheld Dremel tool and carefully carved out each letter and cross.


Once all of the letters and crosses were carved, I simply pulled off all of the remaining paper from the epitaph printout, and then gave it a quick AND GENTLE spray from my garden hose to remove any leftover glue.

I then moved to the skull. I used a 4" full paper mache skull that I had picked up from Pat Catan's. I used a coping saw to cut the rear of the skull off, going from top to bottom. I then took the skull face and positioned it on the stone between the two crosses, tracing around the shape. I then engraved the area around the skull shape. This would allow me to embed the skull into the stone.


Once I made an even engraving all the way around and the skull sat flush, I glued it into place with a healthy glob of Gorilla Glue and let it sit overnight. Once the glue dried, I used spackle to fill in the remaining gaps. I really do this to give it a smooth look, as though it was part of stone when it was carved.


I gave the spackle a quick smoothing, and then went to work on the stone itself. I rounded all the edges and corners with a piece of sandpaper to give the stone a weathered look. I also added chips and cracks around the entire shape to give it a worn, aged feel. After everything was sanded, I went to work on the paint.

I have often heard that in painting you should always go from light to dark. But with tombstone paining, I always go from dark to light. I want everything in recessed areas to stay dark. This includes the epitaph obviously, but also the chips and cracks. I start with a complete coat of very dark grey. I never use 100% black, but doing so isn't a deal breaker. Simply my preference for a more authentic look.


After the dark grey dries, I dry brush a thorough coat of medium grey over the entire stone, leaving the recessed area the darker color. This actually serves as the base color for the stone. And once the medium grey dries, I add a few sparse highlight areas with a light grey.


At this point, I want to go with an even-more realistic look, So I add a watered-down drip/spray coating of green for a weathered, mossy and moldy detail. 

After years of photographing old tombstones throughout my area, I quickly noticed that most of the older stones had a cool, natural green coating to them. So I add this as a final paint step to all of my stones now.


Please note that this photo looks very green due to the fluorescent bulbs in my garage. It looks much better in natural light. And when this green coat dries, I drill two small holes through the stone and place the LED prop eyes into it for the skull's eyes. This time, I went with a pair of blue LEDs and I think they look fantastic.

When that was done, I drilled the two small sections of PVC conduit up into the bottom in order to slide them over 2 pieces of dowel rod driven into the ground when I set it up in my display on Halloween night.

**For a more detailed how-to, go check the post on my R.M. Renfield tombstone from a two years ago. It was the first time I used all of the same steps as this stone, and it has become my standard method for quick, easy and detailed tombstone creation.**

So now that the stone was finished, there was only one thing left to do! So I grabbed my camera, some LED tea light candles and a few LED spotlights...


The first tombstone is now in the "finished" pile and it's onto my next project. It's the big project for 2018 and I can't wait to get started. No spoilers, but this one should look REALLY cool as it guides the trick-or-treaters into the newly updated Highbury crypt on Halloween night for their candy!

We're getting dangerously close to October, so the posts are going to start flying in with more frequency, in anticipation for the big night. Like in years past, things will go absolutely bonkers starting on October 1st, going daily straight through to the big night. Lots to talk about and lots to share, so let's make this year the best one yet.


LED Spotlights From Deadhead Props


After building and displaying my cemetery gate entrance, I realized that something was missing. I was happy with the columns and REALLY happy with the arched sign, but at night, there was no pinpointed lighting on the arch. You couldn't clearly read the sign, boldly proclaiming the Highbury Cemetery name. So I went on a search for cheap LED spotlights. The only condition was that they had to be battery-operated (and cheap), as they were at the end of my driveway and I didn't want any extension cord mess to deal with.


Fast forward to a recent lucky eBay find from Deadhead Props. I had purchased LED eyes from them before and on a chance viewing of their eBay offerings, found the perfect solution! Their battery operated LED flood lights were small, relatively cheap, they ran on 2 AA batteries each and gave off a ton of light!!


I took them out to the garage and just set them up next to the cemetery arch to see how they would illuminate the sign. As I stepped back, I was very happy with the results. These things give off a lot of light for the size, and with the right positioning, should illuminate the entire sign nicely.


And as an added bonus, these things still work great while sealed in a ziploc baggie. Because I wouldn't want them to get wet when the inevitable Halloween rains come. Which brings me to my next point...


Halloween Weather Forecast Update:


I'm not sure how other peoples' forecasts went from rain to no rain, while mine slides closer and closer to being 4 straight years of having to dry everything out. Oh well, all of my props have survived the previous years' soakers, so I'll just continue to keep my fingers crossed and hope for the best. ONLY 2 MORE DAYS TO GO!!! ARE YOU READY!?!?


Final Tombstone Prop


Okay group, just snapped a few photos of the final tombstone for the season. It's another updated stone from previous seasons, but thanks to a mouse in the garage, it needed some plaster to fill up some cozy little gnaw holes that apparently made for a very comfortable bed.

This will be the center stone in the cemetery, the final resting place for the Von Bloemhofs. A lovely couple who had their lives taken before their time, mysteriously murdered on Halloween night, 1911. They say that if the light is just right, you can see the lovers rising from their grave every October 31st to exact their revenge on the guilty...

...or at least on the neighborhood trick-or-treaters.


This is the third and final stone to use a skull face and LED lights to illuminate the eyes. The same technique was used for my Pratt and Blasko stones as well.

So the tombstones are complete, the fencing has been updated and the LED lights are ready to go. It looks like the cemetery portion of the yard haunt is set, so it's now on to finish the front porch. Time to kick it into overdrive and get things finished.


On a quick sidenote, Mrs. Von Bloemhof and I just finished watching Dark Night Of The Scarecrow. What a great flick! A made-for-tv movie that aired on CBS on October 24, 1981. Netflix just got the new updated DVD and it looks fantastic. It's a terrifying story of revenge that relies on plot and suspense instead of gore (hey, it was made for tv). I've read a lot of reviews and everyone agrees that this is a classic horror film. Put it in your queue now! 

"Bubba didn't do it!"


6 more days until Halloween. The current forecast:
61 degrees with a few showers, 30% chance of rain

Halloween Prop No. 2


Halloween prop number 2, a sister piece to our Pratt Tombstone, is in the books! The newest member to be buried in Highbury Cemetery is none other than Bela Ferenc Dezso Blasko.

I updated another one of our old, blank tombstones with the same mache skull and the same finishing/painting techniques as the Pratt (check out the link above to see all the details). I used a set of green LED lights for the eyes on this one and found out that they are much brighter than the red LEDs we used for the Pratt stone.

I intend to make one more tombstone with the same skull and another set of green LEDs, so I think it will look pretty cool with two green-eyed tombstones flanking one with red. The first shot is in regular light to show the weathering and detailing techniques that were used, and the second and third shots are with the same multi-color LED spotlight that we shot the Pratt stone with. Enjoy the pictures as I'm off to start tombstone number 3!


Halloween Prop No. 1


They say that the devil is in the details. I realized this in looking at my props from 2009. They were good, but they weren't great. My haunt lacks that visual punch to really set it apart. So I've decided that 2010 is going to be the year of detail. I'm going to go back and update and improve all my old props that I already have. I still want to add at least one more new animated grave-popper for this year, but the focus will be to update everything that we already have and really pay special attention to the little things.

I'm sitting here enjoying my first Octoberfest beer of the season (unfortunately, it's Sam Adams, but I'm really not complaining. I'm just waiting patiently for the pumpkin ales to start coming out. And I'm looking at you, Dogfish Head!), and I'm really excited because I just finished my first prop update for the season. Prop number one is a nice update to a tombstone that I have been using for the past four years. And while is looked like an old faded tombstone, it never had an epitaph. So it was never really finished. Until today. 

Let me show you what I did:

I started with the old 2-inch thick white "popcorn" foam insulation panel that I cut the basic tombstone shape out of. I traced it and cut it out with an old butterknife. It gave me the slightly jagged edges that looked authentic. Originally, I used a rattle can of flat black spray paint, and misted it across the face and sides, using heavier, condensed sprays in areas that I wanted a crumbled look, as the paint would actually eat away the foam. This year, I went back and put a full coat of flat white acrylic ceiling paint on the entire thing to form the base color. I then went and watered down some old chocolate brown acrylic interior paint and began putting multiple coats on the front and sides, doubling up in areas that I wanted to have a streaked and weathered effect. I also bought a paper mache skull face from Michael's for $1.99. I painted this with the white to match the stone (it's in the bottom right of the photo below). I then traced the outer edge/rim of the skull onto the tombstone face.


I then used an X-ACTO blade and cut out an area where the skull would be recessed.


I used Gorilla Glue to attach the skull to the recessed area and added some spackle plaster to the outer front edge.


Next was the fun part: the epitaph. I had always wanted to pay homage to my favorite classic horror actor so I got all of his information, found a great gothic font, did the layout, 11" x 17" printouts and trimmed out the letters (remember to leave an area attached on your A's, B's, D'd, O's, P's, Q's, R's, 4's, 6's, 8's, 9's and 0's, or else you'll cut the inner area out!) to form stencils. I laid the stencils onto the tombstone face and traced the edges with a sharpie marker. With the smallest lettering, I actually just filled the letters in with the marker.


I then went back and filled in the larger letters with some flat black latex paint. Almost done!!


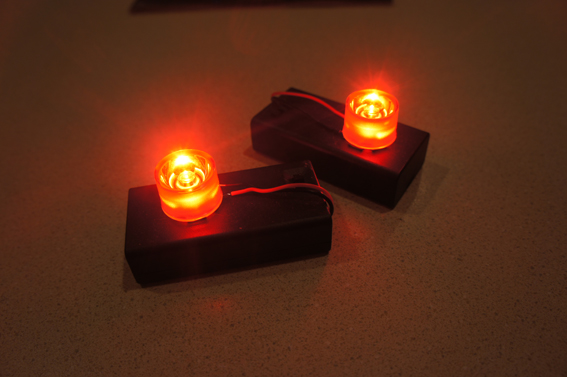
I really wanted to give this stone an extra zing, so I got some red LED lights from deadheadprops on Ebay. They're cheap and they're bright. And they run off of a standard 9 volt battery. I added a section of drinking straw to both lights, slightly longer than the width of the tombstone (I taped them in place with electrical tape). This would give me the rigid "tube" sections I would need so that they would hold when they were threaded into the foam stone.


I bored two small holes, slightly smaller than the diameter of the LED lights, through the foam. They held tight without any glue, so now after the season is over, I can simply pull them back out for safe storage. They light up the skull eyes perfectly! I went back and added some more watered-down brown paint around the lettering and topped it off with some spanish moss that I also got at Michaels. 

For the final product, I cast a few different colors of LED light with a multi-color LED light bulb that I also picked up on Ebay (complete with a handy wireless remote to change the colors!)

Enjoy!!


Now only 6 more tombstones to go! I got two more skull faces along with two sets of green LEDs to make two matching pieces to this one. Check back to see who gets immortalized in Highbury Cemetery next!