Trick Or Treat Update


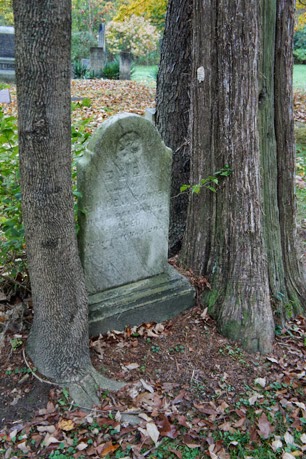
Somewhere in the middle of all this wonderful green is Highbury Cemetery...


Well, Mother Nature has played her hand and it looks like we have to fold. Constant rain throughout the afternoon has led us to scale back considerably on our yard haunt display this year. If you are in the neighborhood, still come by as we do have a setup and we will still be handing out candy, but don't make a special trip. 

The forecast was wavering all week, and by today it was too late to reschedule trick-or-treat. I apologize to everyone in the neighborhood and to everyone who saw the story in today's newspaper and was planning to stop by. I desperately wanted this year's trick-or-treat to go off smoothly, but it wasn't to be. Tonight, we'll pack up what props we did put out and hopefully they'll be dry by next Halloween. At least we still have a cooler full of ice cold beer to lift our spirits.


I have a few day shots and I'll try to snap a few nighttime shots of our haunt between the raindrops...


A home haunter's worst fear:


Happy Halloween!!


Here it is! The greatest day of the year!! Pumpkins. Monsters. Witches. Ghosts. Candy. Trick-or-Treat. It's Halloween!!!


It's going to be a very quick post today because we are underway for setting up the Cemetery for tonight's trick-or-treat.


Our Big News:
I'm thrilled to announce that after 10 long years, Highbury Cemetery has finally made the local paper! In today's Akron Beacon Journal you'll find a nice little article about me and this crazy thing we do every October 31st. So if you are visiting from the link in the paper, I would like to welcome you to our small slice of Halloween. Please come in and take a look around. You'll find lots of articles on what we do and the inspiration we find to do it. Feel free to contact us in the form on the right side and let us know what you think. You really have stopped by at the perfect time!! And a very big thank you to Jim Carney and Karen Schiely from the Akron Beacon Journal for the great article and photography!!! You'll both get extra candy in your bags!


We're going to scale back just a bit, as were expecting some torrential rains this evening (again), but do stop by if you're in the neighborhood. We'll be sure to post up pictures from the night's festivities by Sunday...

But until then:


On The Eve Of Halloween...


Here we are, the day before the big celebration. Halloween. The last of the props will be finished tonight, all pieces have been diagrammed and all props and lights have been tested. We're almost ready to go. Almost.

Four months of planning and building all come down to this. A flawless execution of set up and tear down in less than 18 hours. Our commitment to the season. Our commitment to trick-or-treat.

This one will be tough, because as I look at the weather forecast, Mother Nature looks set to play her trick on us. The past 4 days have been sunny and relatively mild. Tomorrow? 100% chance of rain. The third or fourth year in a row where it rains on Halloween. But we have decided to press on. We will give the neighborhood the show that they have come to expect from us. I just hope that all of our props and lighting can withstand Mother Nature's nastiness.

As in previous years, I like to give a juicy little snippet of things to come and this year is no different. A teaser to stoke excitement. A nugget of things to come.


I've put a lot of time and effort into this year's display and a little weather won't stop me. Tonight, I'll put the final touches on the pieces for the yard, I'll slowly start to relax, pour a Drunken Jacko-approved beverage and pop in my annual Halloween Eve BluRay of Trick 'r Treat and get set to put on one hell of a show tomorrow.


And be sure to stop by tomorrow morning as I have one last treat up my sleeve to share with everyone!


I Can't Catch A Break...


Well this sure puts a damper on things...


Middlebury Cemetery - Akron, Ohio


So we've reached the final installment of Cemetery Sundays for 2013 and I have a confession to make. I am a criminal. I willfully broke the law. To get the photos for this cemetery, I had to commit an act of trespassing...

As I arrived at the entrance to Middlebury Cemetery, I noticed a lock and chain fastened around the gates. But I needed to get these photos. Because Middlebury is a registered historic site and it contains the oldest tombstones in the city of Akron. So I went around the side and hopped the fence. With full intent to break the law.

Mr Policeman, you may take me away now...


As I wandered the grounds, I noticed that many of the beautiful old stones had suffered the effects of time as many had been broken, toppled over, or worn away from any visible identification. A few of the graves were tagged as veterans who served as far back as the American Revolution. There was a lot of history tucked into such a small area.


A Quick Update


No real post today because I'm spending the day in the garage, working like mad to get the last of my new props finished in time for Thursday. Instead, I'm just going to go through a couple of things happening...

First, good luck to all of my fellow home haunters whose Trick-or-Treat takes place tonight. Scare lots of kids and have lots fun doing it!

Next, the Highbury Cemetery 2013 T-Shirt Night of the Living Contest is still going on! Nobody has submitted the answers to the three questions yet. Wanna win a FREE shirt? Why not check it out and give it a go!!

Also, if you find yourself with some free time today, why not check out Outside The Cinema's Annual Halloween Throwdown. They'll be broadcasting horror movies all day, building up to the night's big feature, Heavy Metal Massacre (a movie widely panned as one of the worst ever made)! It's a great podcast and the Throwdown promises to be a great time! Horror movies ALL DAY LONG. Tune in at tv.outsidethecinema.com.

And finally, I came across a great, free comp from Graveyard Calling Records out of the UK. A Haunted Journey is a comp featuring 14 tracks of ambient electronic music that sets a wonderfully creepy atmosphere for the Halloween season. Visit the label's Bandcamp page for more cool electronic tracks and comps!


We'll be back tomorrow with our final installment of Cemetery Sundays for 2013. We'll be touring a small, local cemetery that I had to jump a locked gate to get into...


Night Of The Living Contest! 2013


We're down to the final week before Halloween and the annual t-shirts have been printed. It's the final Freebie Friday for October, so that means it's time to give one away!

Welcome to our Night of the Living Contest, where one lucky follower will win a FREE Highbury Cemetery 2013 t-shirt*. This year's shirt features a glow-in-the-dark design based on the 2013 logo. As an added bonus, you'll also get the matching glow-in-the-dark square pin!


* Shirt comes in size large. Contest is open to residents of the continental U.S. only, because I'm too cheap to pay for oversees shipping. Canada, I guess you're cool, so you're in, too.

Okay, we're going to keep this contest quick and easy. The first person to post the correct answers to the three Highbury Cemetery blog trivia questions below wins the shirt. All answers will be found within this blog. Simple enough? Okay, let's do this...

Ready, set, go.


Here are your three questions:
1. What anniversary is Highbury Cemetery celebrating this year?
2. What name is inscribed on the tombstone of the witch buried in Peninsula, Ohio?
3. What Halloween soundtrack was "recorded LIVE on the estate of COUNT DRACULA"?


So there you have it. The first person to post the correct answers to all three questions in the comments section below wins. Good luck and get cracking!!!


Desiderii Marginis - Ephemeral


A great dark ambient track with an even better video by the Swedish artist, Desiderii Marginis.


DIY Screenprinting - Part 2


We're back with the second half of our DIY screenprinting how-to. Yesterday, we built a light exposure unit on the cheap, and we are now ready to get our final art transferred to the screen and ready to print.


Part 2 : Exposing The Screen

Before starting this step, there are a few items that you will need to have. I picked up everything on this list from Pat Catan's, but you can also get them at Michael's or even on Amazon.com.

Here is the list of items that will be needed (the links go to amazon.com for photo reference):

- 10" x 14" Speedball Screen Printing Frame
- 10" Squeegee (for spreading both the emulsion and then the ink)
- Speedball Diazo Photo Emulsion Kit (contains a bottle of photo emulsion, a smaller bottle of developer and a bottle of emulsion remover)
- A clean piece of glass or plexiglass that is larger than the screen (I used a piece of replacement glass for a picture frame)
- A piece of inkjet-compatible transparency

To begin part 2, we must have artwork ready to use. For this how-to, I used the artwork for our new 2013 yard haunt shirt, based on our new logo. I created this artwork in Adobe Illustrator. I recommend using it or another vector art-based program when setting up your work versus a pixel-based program like Photoshop. The vector art will give you clear and crisp shapes and will produce a better image when printed.


The final artwork was converted to a black and white image (no greytones), where the black will print through and the white will block out. Once the art was finalized, I printed it out on a piece of inkjet-ready transparency. I made sure that I used a "best quality" setting on the printer to insure that I got a rich black on the printout. If you don't have a piece of transparency, you can take your art to a local FedEx Kinko's and have them print one for you.


Once the transparency was printed out, it was time to mix the photo emulsion and apply it to the screen. The Diazo Photo Emulsion was easy to mix (add water to the developer bottle and then mix that into the emulsion - the final mix will turn green) and was very easy to apply, as you did not have to apply it in the dark. I used the squeegee to apply a thin, even coating to both sides of the screen.


(Note that the dark image on the screen in the photo above was a ghost image from the previous project that was applied to this particular screen. The black ink from that previous screen actually stains the screen, but the screen was completely cleaned before the new emulsion was applied.)

Once the even emulsion coating is applied, I let the screen dry completely in the dark. I could be wrong, but I think that once the emulsion dries, it becomes light sensitive, so keep it in very low light until it's time to use the exposure unit...

When the screen is completely dry, it is ready for the image to be burned into it. This is where you take the transparency printout and tape it to the bottom (flat) side of the screen. VERY IMPORTANT: be sure to attach the transparency "backwards." This way, the image will read the right way when you go to apply the ink from the opposite side.

With the transparency taped tightly to the bottom of the screen, place it onto the light exposure unit. Place the oversized glass on top of the transparency. This will form a tight seal on the screen and insure that you get nice, crisp contrast when the screen gets exposed to the light.

Once everything is in place, turn on the halogen lamp on the top of the exposure unit.


I have found that an exposure time of 15 minutes works well with a 500 watt lamp. Simply turn on the light and leave it be. After the 15 minutes is up, turn off the exposure unit lamp. I have a utility tub in my basement that I use to wash the screen after exposing it. I run lukewarm water over the screen at a brisk flow. After a few minutes, the areas that were black on the transparency will wash out, leaving your new image in your screen. Be sure to wash all of the detail areas out, because the ink will only pass through the open areas of your screen.


Gently dab the excess water from the screen with a paper towel, and then let the screen dry completely overnight. In the morning, your new silkscreen will be ready for printing.


DIY Screenprinting - Part 1


Every year, I screen print one-color t-shirts for our home haunt and give them out as a thank you to everyone who comes over and helps put up, tear down or just gets dressed up and scares on Halloween night. I have always created the artwork and then passed it off to a friend (who has his own screen printing studio) to create a screen for me.

Last year I finally decided to bring the whole process in-house and was surprised at how easy and inexpensive it was to do. By following this quick two-step process, you can create simple shirts, posters, patches and more for your home haunt or Halloween project.

Here is part one of setting up your own in-house screen printing studio...


Part 1: Building Your Light Exposure Unit

In screen printing, you are dealing with positive and negative space in your art. In simple terms, the positive (black) area of your art will be the areas that will have ink and the negative (white) areas will block out. 

To get a print-ready screen, you must first have a silk screen covered with a light-sensitive emulsion coating and a positive/negative transparency (which I will cover in Step 2). This screen must be exposed to an intense light source so that the screen will be activated and ready for printing.

The first step in this process is building your light exposure unit. Here is the simple materials list needed to build the unit pictured below.


Note that the unit isn't perfectly square or made with the highest quality materials. Our goal is to simply make a unit that will support the light at the top. I gathered scrap 2x4s from the garage to make the framework and picked up the light from Lowe's.

Here's the breakdown of materials used:

- 2x feet @24" each (The feet will need to be long enough so that your silkscreen can lay flat across them when it is being exposed. Be sure to attach these board flat - this way the screen will have a solid base to rest on)

- 1x base @20" (the feet will screw into either end of the base)

- 1x support post @18" (this is the vertical piece that supports the arm)

- 1x arm @ 10" (this piece will support the light)

- 3" screws to put it all together

- 1x 500 watt utility work light. I used this one at Lowes.

Once you have all of the pieces of wood screwed together to look like the framework above, tighten the clamp on the light and firmly attach it to the end of the arm. You want to make sure the light is tight because you don't want it moving around when exposing your screen. You'll also want to make sure the light is positioned directly above the center of the feet. When exposing the screen, you'll want the light to shine directly down onto your screen so that there are no shadows from angled lighting.

And just like that, you have finished the hardest part of the screen printing process! Tomorrow I'll show you how to create final artwork and expose your screen in preparation for printing.


Nekrogoblikon - No One Survives


Monday mornings aren't always fun, but Nekrogoblikon's video for No One Survives sure is! May you all have a quick and easy Brad-free week...


Cedar Grove Cemetery - Peninsula, Ohio


Today's Cemetery Sundays installment has us traveling to the historic town of Peninsula, Ohio and it's local cemetery, Cedar Grove. We get an extra Halloween treat because this one has its own ghost story...

Upon entering the main gate, all of the older tombstones are front and center. Many of these old, decaying stones date from the early to mid-1800s.


Among all of these old stones lies one slightly different than the rest. If you don't know the legend, you'd probably walk right past it...


No epitaph outside of the name "McGovrn." No date of birth, no date of death, no first name...


...on the sides, only a few odd symbols of triangles and crosses...


 ...and on the top, a slightly charred, blacked fragment that has been reattached. And what could have caused this?


Lightning. Or rather, multiple instances of lightning. Because according to local legend, this nondescript "McGovrn" tombstone marks the grave of a witch. And since her burial here, lightning has struck the top of her tombstone with great frequency. So much so, that the discolored tombstone has started to melt. 

As a younger boy, I had heard a tale that if the tombstone was destroyed during another lightning strike, the witch would be able to rise from her grave. Maybe this is why the groundskeepers go to such great lengths to keep the stone complete. But be vigilant, there are always dark storm clouds gathering from the west...