skip to main |
skip to sidebar
This one is great! From HalloweenDailyNews:
Legendary Halloween franchise composer and frequent John Carpenter collaborator Alan Howarth today shared a Youtube link to his concert performance on Halloween night 2013, and it's awesome. Check it out in the player below!
The new centerpiece for Highbury Cemetery was created this year in the form of a new entrance gate with stone columns and a rusted arch sign. Completing this enormous piece took about 4 months total and was the only major project to come out of the Highbury garage this year. And although it was the only project, it became the new focal point to the yard haunt and immediately received rave reviews from all who braved the elements to trick-or-treat at our house this year.
Here's a rundown on this project, from start to finish...
Before beginning the build, I traveled to Stan Hywet Hall & Gardens, a large local estate built in 1915 by F.A. Seiberling, founder of the Goodyear Tire & Rubber Company. This country estate has many wonderful reference points, including parts of the original stone wall that surrounds the entire grounds. I used photos from this old stone wall as reference for the look of my stone columns. I wanted to have the same imperfect, weathered look as this actual wall.
To start, I built a framework for both columns. I used 1x2s for the vertical pieces and 1/4" particle board for the top, middle and bottom square pieces. The framework was measured out at 24" x 24" x 72" tall (the lower cross brace was going to be used for a removable panel at the base for access to lighting wires, but I later changed the design and sealed them off).
I first formed the base, using 2" thick foam sheets from Lowe's. The main column was then finished using 1" thick foam sheets.
Before I put all four sheets of the 1" foam on, I added another piece of the 1/4" particle board with support pieces. I used a few pieces of scrap foam to create a square in the center of the board. This square would act as a guide to hold a vertical piece of 1-1/4" PVC pipe. I then drilled a 1-1/4" hole in the middle of the top board of the column. When finished, the supported PVC would stick out of the top of each column and act as a guide to hold the sign that would span the entrance.
The PVC pipe would sit snug in the above square. When this all lined up, I applied the final piece of foam board to complete the column form. With the form complete, I measured out the lines that would outline the stone shapes. I used a 9" block height, as it came the closest to an even distribution. I then used a random array of widths for the blocks, making sure the vertical lines were spread across the corresponding blocks.
At this point of the build, I shifted gears, as I knew I wanted to have a plaque on each column, along with a rusted lantern above each plaque. I found an ornamental shield shape online, printed it out at full size, traced it onto 1" foam sheet scraps and then cut both shield shapes out.
I then printed out the words for both columns: "MORTEM" and "ABUNDET," which is Latin for "Death Abounds." Perfect for a creepy old cemetery entrance (In fact, I liked it so much, MORTEM ABUNDET has become the unofficial tagline for Highbury Cemetery and was also used on this year's logo and shirts). I made a stencil for each word, traced the lettering on the shields, and then carved each letter with my new Dremel. After the lettering was complete, I weathered the shield with an orbital sander. The final step was to add the cracks, which I did by taking a piece of sandpaper and folding it in half. I then took the grit edge and ran it in small strokes down the edges of the shield. It worked perfectly to notch little cracks along each of the edges.


After all of the weathering was complete, I painted the entire shield with black paint. This would give the dark color for the lettering and the deep areas of the cracks. Once the black coat was dry, I went back and dry-brushed a coat of dark grey, making sure that the paint only went onto the raised areas.
And after the dry-brushed grey coat was dry, I went in with a watered-down wash of white to create some weathered highlights.
After the shields were weathered to my liking, I went to work on the lanterns. Of course, I forgot to get any pictures, but I used the same IKEA outdoor lanterns and the same paint-rusting technique that I used on my zombie lanterns, which has a how-to here. I ended up attaching a small curtain rod hangar (with the same rusting technique) above each shield, where the lanterns hung perfectly.
Once the lanterns were complete, it was time to finish the columns. With the lines all drawn for the blocks, I carved the lines with my Dremel and a grinding wheel attachment (with a depth guard, as I didn't want to cut too deep). It left a nice, thick line and looked like grout.
And although it looked good after the Dremel carving, I went in and touched up each line with my sander, as it still looked too uniform for my liking. To complete an authentic stone look, I went to town with the orbital sander, grinding haphazardly at each of the edges as well as the block faces so that it no longer had such a flat appearance. The key was to imitate nature and remove all of the flat edges of each block.
When I was happy with the amount of sanding, I traced the outline of the shield and began to paint the columns.
At this point, I did not document the painting process, but believe me when I say that it was the most time-consuming and tedious portion of the build.
I started with black paint on each grout line. I then painted the entire column (minus the grout lines) with a sandstone base color.
After the sandstone, I went into the recessed areas with a watered down green paint to imitate moss and mold.
The third color was a watered-down grey that was applied to the entire column, as I wasn't happy with the sandstone color.
After the grey, I still wasn't happy with the look, as it didn't look natural enough for me. So I rolled the dice and went with a watered-down black wash over the entire column. This finally gave me the dark, weathered stone look that I was looking for. It gave the right mixture of cold, grey stone with weathered, mossy highlights.
Once all of the paint dried, I attached the shields and was quite happy with the way everything came together.
With the columns finally finished, it was time to build the rusty arched sign that would span the columns. I started with a 1/4" thick sheet of 4' x 8' particle board, a length of 1-1/2" PVC pipe and a sheet of 1" foam board.
I knew I wanted the sign to be arched, so I laid out a to-scale diagram in Adobe Illustrator with the correct degree of arc. I then printed the bottom segment of the arc (I had to scale the image across multiple pieces of paper, as it measured 8 feet across!). I traced it onto the sheet of particle board, measured the height of the sign, and then traced it again to complete the top arc. When everything was traced out, I cut out the form with a jigsaw.
With the frame of the sign complete, I then printed out the lettering for the sign using the font Abaddon, which can be found here. I traced each letter onto the foam board and then cut them out with the jigsaw.
When the letters were all cut out, I spaced them across the sign frame and attached each with Gorilla Glue and a few screws. With the letters all in place, I bolted a length of 1-1/2" PVC pipe to both sides of the frame (these pieces will slide over the 1-1/4" guides that are coming out of the top of the columns, and the lengths of pipe will vary, depending on the desired height of the sign above the columns).
After everything was assembled, it was time for some paint.
I started with a complete base coat of black. Be aware that the PVC needs to be sanded before painting so that the paint will adhere to it better.
After the black base coat, I applied a loose misting of brown spray paint, making sure that I did not cover all of the black. This color forms the base of the rust look and needs to be splotchy in its application.
The final color was a very sparse spattering of dull orange. In applying this color, I was able to lightly press the tip of the spray paint can, allowing the paint to spatter out. I applied a loose stippling of orange across the sign, concentrating on certain areas to show more of a rusted look.
The final paint job looked very realistic and I was quite happy with the way it turned out, too.
With everything now complete, it was time to set it all up and see how everything lined up. The sign posts slid over the column guide posts with ease and everything set up very sturdy.
On Halloween night, the new cemetery gate entrance was positioned at the foot of our driveway with a thick dressing of Spanish moss, LED flicker tea lights in the lanterns and withered corn stalks on either side of the columns. It was the perfect highlight for our upgraded cemetery haunt and made for a truly eerie effect as it welcomed all of the trick-or-treaters that had to pass under its sign to enter the yard and receive their candy.
Slow days around the Cemetery now that Halloween has passed, everything has been dried out and put away. So why not kick back and listen to the classic horror-punk soundtrack from one of my favorite movies of all time, The Return of the Living Dead!
"Do you ever fantasize about being killed?"
Who is the Daikaiju??? Premium action heroes deliver
most high rocket music! Special reverb skill combo for full impact! Loud
sonic boom for earful pleasure! Beautiful radiation of
hyper-dimensional springy sound creates divine psychic wind for your
special defense! Worship Psycho-surf band Daikaiju daily for good luck
and health!
I got the chance to see Daikaiju play last night at Buzzbin Art & Music Shop in Canton, Ohio (I unfortunately missed the show that they played the night before at the bar 5 minutes from my house, part of a 4-shows-in-2-nights swing through Northeast Ohio).
Definitely one of the best live shows that I have seen in the past few years. Totally hilarious chaos that couldn't be confined to a small area. Daikaiju are currently on tour. If they are playing your town, it's a no-brainer. Get to the show for most high rocket music!!
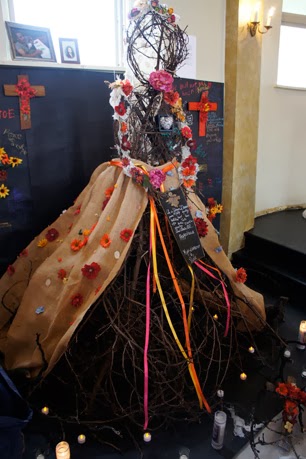
Saturday, the Highbury family got a chance to put the disappointment of Halloween night behind us by heading up to Cleveland to join in the fun of the 9th annual Dia De Muertos.
Honoring the spirit of deceased loved ones with mariachi bands, altars created by local artists, a cemetery display, dancers, sugar skulls, food, intricate dia de los muertos makeup, giant puppets and a skull and skeleton procession parade made for a really great way to spend a rainy afternoon...